GAIL Export to Merge Letters, Envelopes or Labels
Do you need to export an excel file to use in Word for Merging letters, envelopes, label, etc.? A sample event invitation will be used for this purpose. Continue reading to learn more.
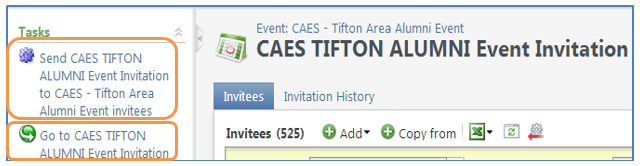
After you have chosen the Tasks option to “Send (invitation)”, you should then choose to “Go to (name of your invitation)” (also from the Tasks section of the Explorer bar).
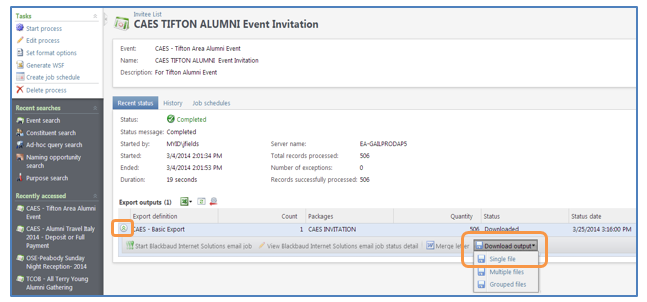
From the below screen, you can click on the green arrow button next to your chosen Export Definition, then click on the “Download output” button and select “Single file”.
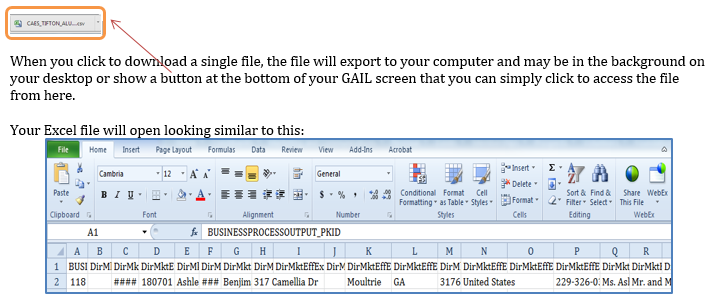
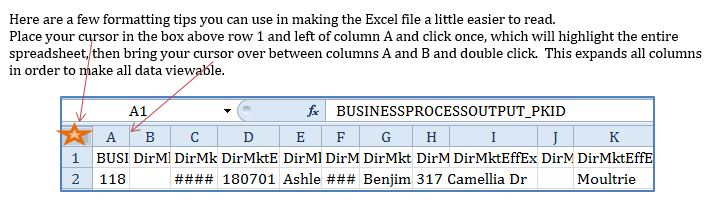

Before you do too much formatting or moving columns/data around, be sure you save this file to your computer’s hard drive – click File, Save or Save As (if you wish to rename the file). Also, you will need to save the file again before closing out so that it will retain all the changes you made.
This is the point where you will need to review all the columns of data and note the column names that you will want to use in your merge document (to print labels, letters, or envelopes). Typical columns that you would need might be:
- Name or Addressee (for Envelopes and Labels)
- Salutation (for letters)
- Address Line 1
- Address Line 2
- Address Line 3
- City, State Abbreviation, Postcode
- Country ID
Now you’re ready to bring this data over into Microsoft Word. Open a session of Word, next click on the Mailings tab.
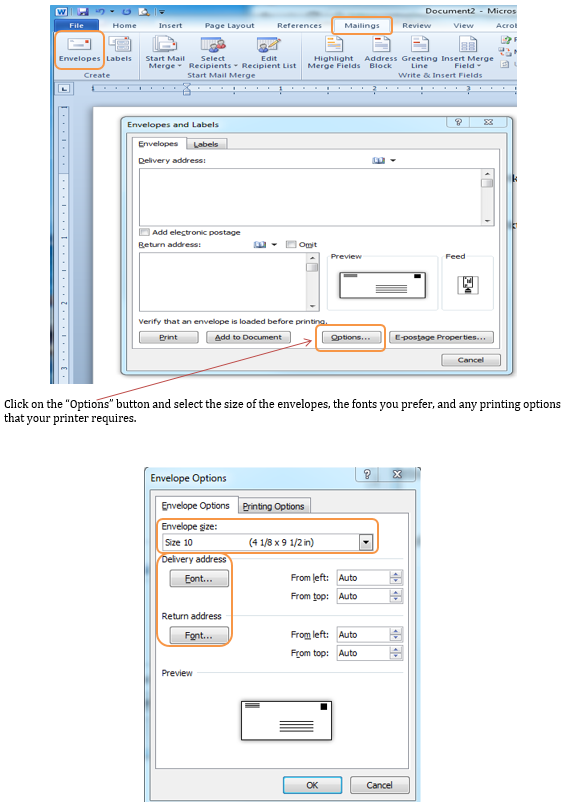
- If you choose “Envelopes”, you will have to select the formatting option that meets the size of the envelopes that you will be printing on. You’ll create the page layout for envelopes, next choose the Merge fields.
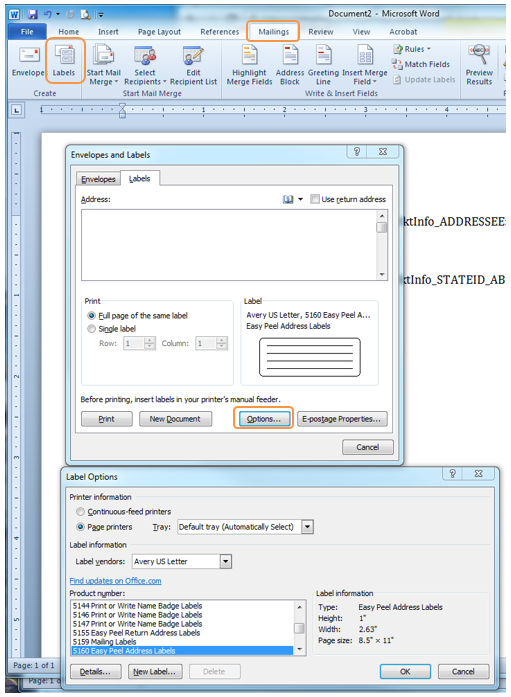
- If you choose “Labels”, you will have to select the formatting option that meets the size of the labels that you will be printing on. You’ll create your page of labels, then choose the Merge fields.
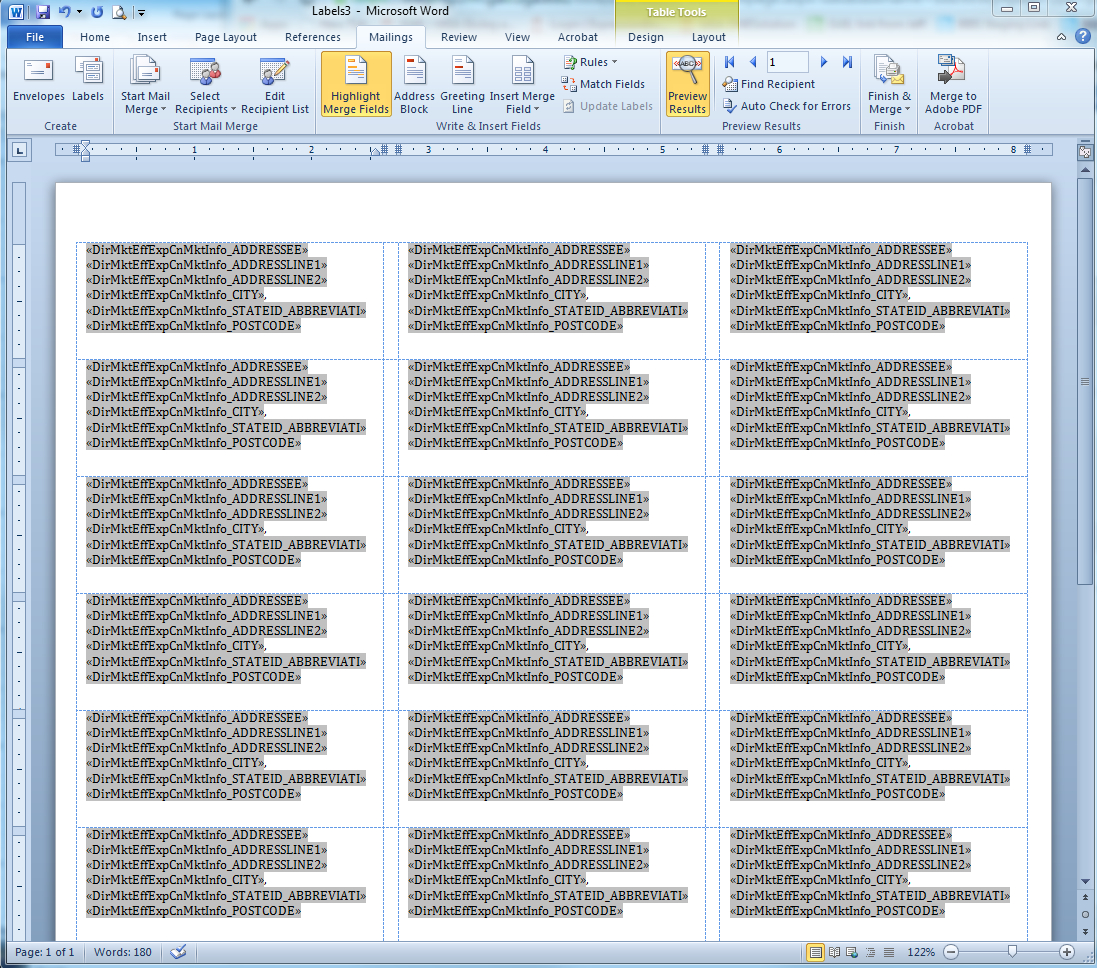
Preview Results, adjust if necessary, then Finish & Merge – Choose Edit Individual Documents so that you can preview and adjust again before you print them out.
- Or, if you wish to print Letters, you will have to select the formatting option that meets the size of your letterhead paper that you will be printing on. You will select the Merge fields to populate into your letter.
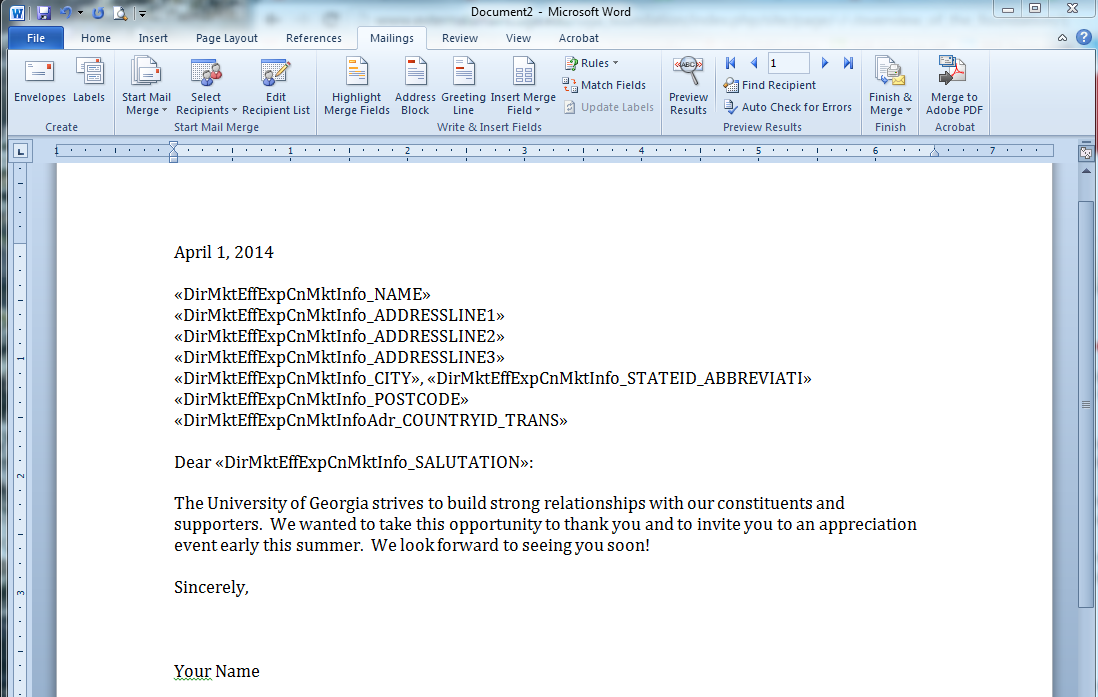
This is where you will select the Excel file you just saved. Click on “Select Recipients”, then choose “Use existing list” and navigate your computer to the location where you saved your Excel file and select it.

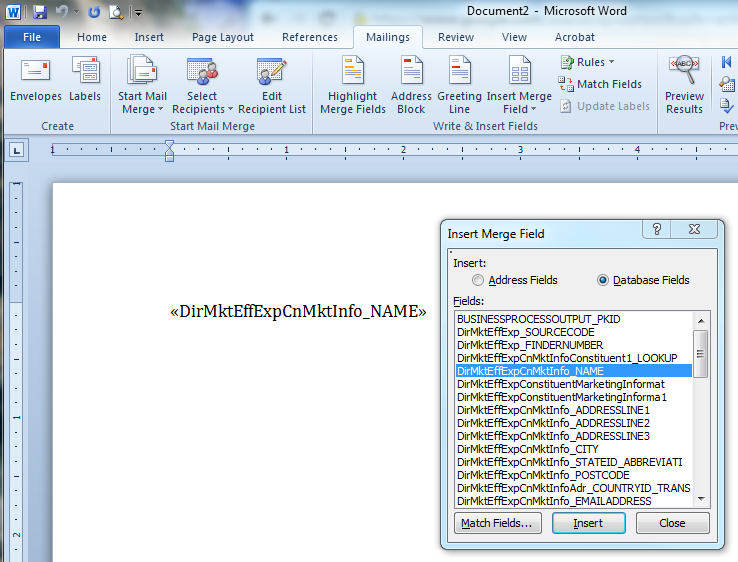
Now that you have chosen your file of constituents, you need to set up your document by selecting the data fields you wish to use. Click on “Insert Merge Field” from the menu bar. A box will pop up called “Insert Merge Field” and this is where you will select all the data fields that you need – simply double click all your options then you can organize them after you’ve selected them all.