Event Smart Query for Registered/Attended Constituents
Event Managers – don’t forget that you can easily communicate with the registrants and attendees of your events through GAIL without needing to submit an AskIT ticket for a new selection. Each school/college/unit has their own smart query that will pull these groups based on which event you set it to pull from.
Please note that each SCU only has one smart query, meaning others in your unit have access to it. The process will overwrite the results each time it is used. If you do not add the smart query to an invitation shortly after editing it, you will need to re-run the smart query to ensure that you are pulling the registrants/attendees of the correct event.
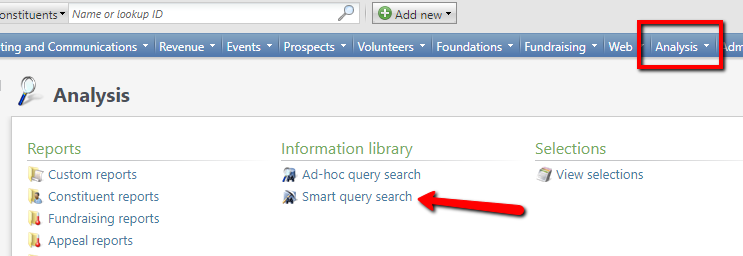
1. Navigate to the Analysis functional area and click Smart Query Search.
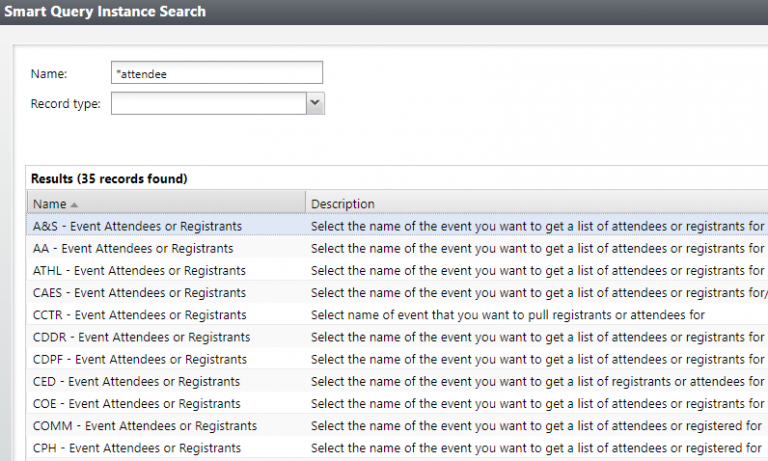
2. Each SCU has their own smart query. Locate yours by searching for your naming convention + “- Event Attendees or Registrants” and select it from the list.
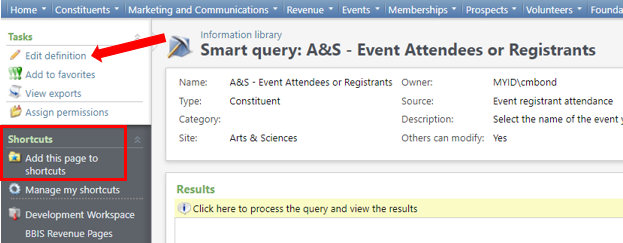
3. Now you need to edit your smart query to pull from the correct event. Click Edit Definition on the Tasks bar.
Pro tip: To save yourself time click Add this Page to Shortcuts once you locate your smart query. Next time you need it you won’t have to search.
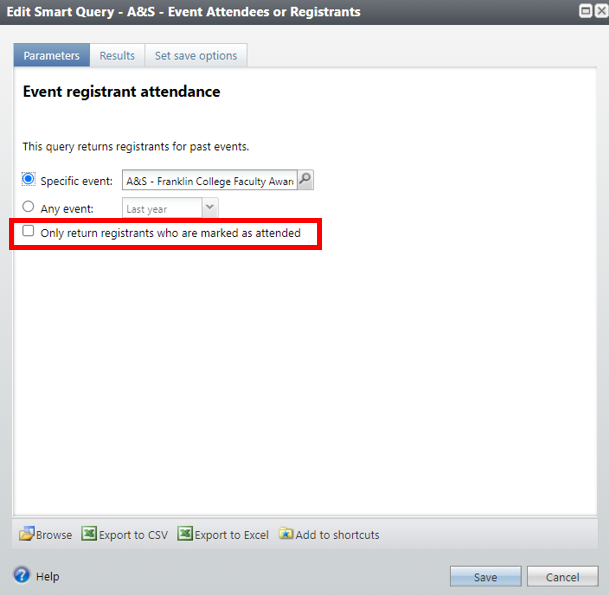
4. Search for the event you want to pull registrants or attendees from in the *Specific Event box. Specify whether you want registrants or attendees, and save.
All Registrants: leave the “Only return registrants who are marked as attended” box unchecked. This option is typically used for sending out communications beforean event has taken place (i.e. parking information).
Only Event Attendees:make sure the “Only return registrants who are marked as attended” box is checked. This option is typically used for sending out communications afteran event has taken place (i.e. a follow-up survey).
Pro Tip:
For multi-level events: You need to be sure you pull in the correct event level for the invitees you’re wanting to send a communication to. There will be a unique event lookup id# for each level and that is what you need to plug into the smart query search box.
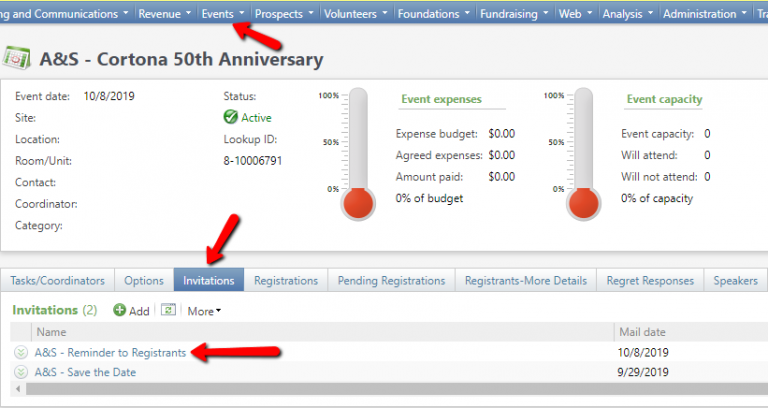
5. Once you have edited and saved your smart query, navigate back to your event and click on the Invitations tab to create a new invitation.
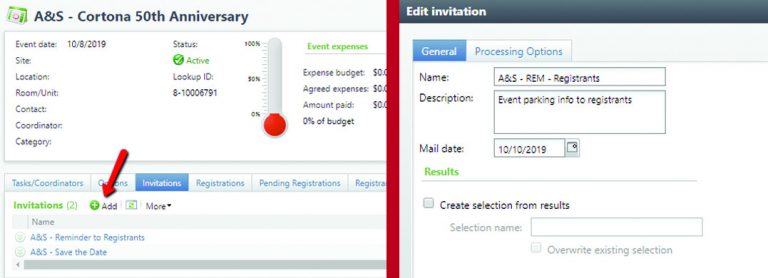
6. Click Add to create a new invitation. Name the invitation beginning with your SCU naming convention and event-specific naming convention, give it a brief description, and add launch date.
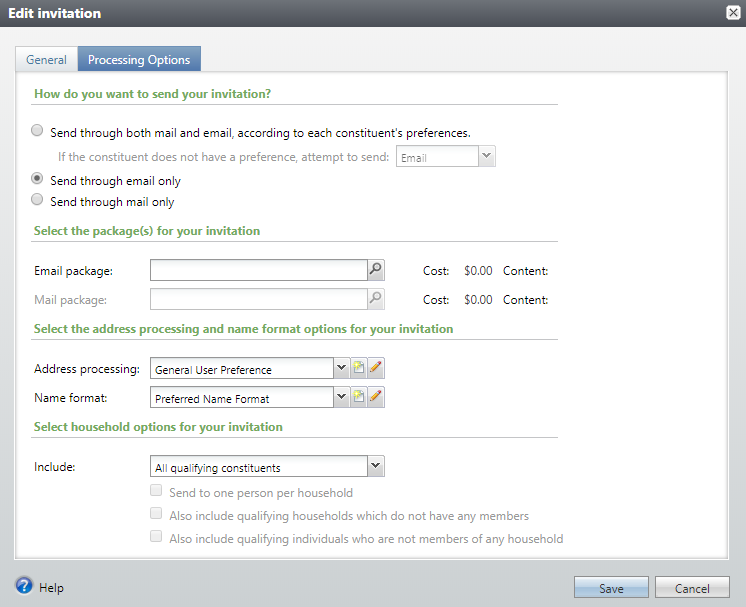
7. Click the Processing Options tab to complete the invitation settings and attach a package. Save the invitation.
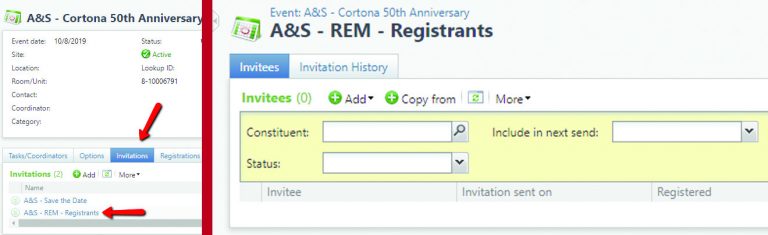
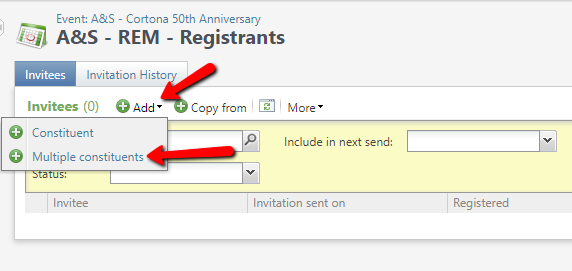
8. Once your invitation has been created, click on the name of the invitation in the Invitations tab to go to the Event Invitees page. This is where we’ll add your smart query as a selection.
9. Click Add then choose Multiple Constituents from the drop down.
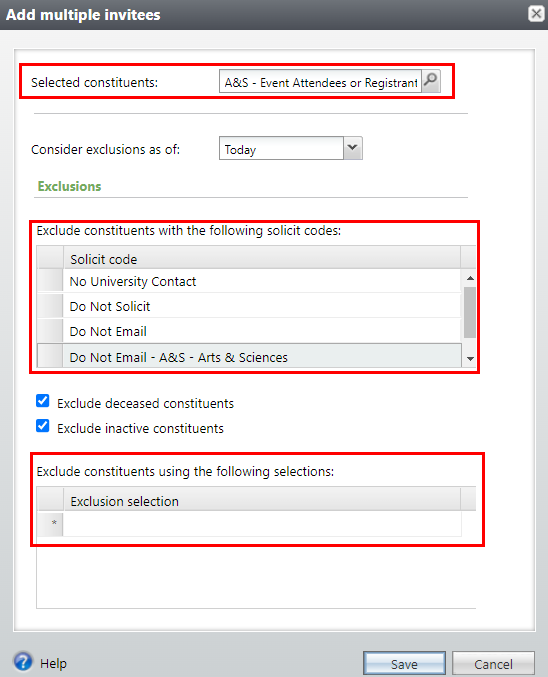
10. In the Add Multiple Invitees pop-up, search for the name of your SCU smart query in the Selected Constituents field. When the text box turns from yellow to white, the selection has been added successfully..
11. Click Exclusions and add whichever solicit codes need to be included on your invitation.
Reminder: you should always have at least 3 solicit codes on any communication you send.
Click Save.
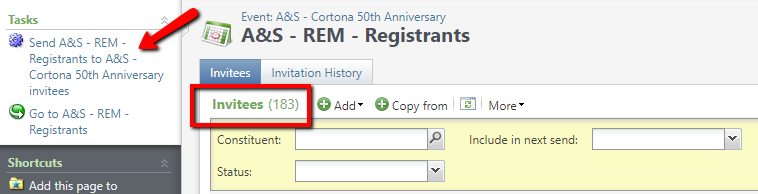
12. The names of your registrants/attendees should now populate the Invitee List. If all looks correct, you can process the invitation and either send your email or download your mailing list.